
Principles of Space Design for Parkour Class and Training
“Parkour can be found/done anywhere.”
Yep. But when you have the freedom to tailor the environment to a lesson that you’re teaching, or a challenge you are trying to overcome, you should take advantage of the opportunity as a coach, to create an even better class experience, or as a practitioner, to optimize your training.
...Define “Better”
Before jumping into how to make your training spaces and set-ups better for your training, it’s good to pin down what we mean by ‘better’. A set-up is good if it is:

INTENTIONAL
Deliberately designed for a particular movement, movement style, or movement goal, such that it maximizes students’ ability to make progress

VERSATILE
Providing both inspiration and opportunity for multiple angles and methods of movement

NOVEL
Exposing students to new perspectives, new combinations, or new ways to expand their toolkits or improve/reinterpret known techniques

SIMPLE
Employing no more equipment or complexity than is strictly necessary to create the desired opportunity. Aesthetics plays a role here, as well—a cluttered feel in a setup is a non-negligible negative.

BALANCED / SENSIBLE
Taking into consideration safety, group size, practitioner size, skill level, traffic flow, coach positioning, and visibility.
Designing a set-up is a game of give-and-take. For instance, intentional-ity often reduces versatility, and versatility often reduces simplicity. The key is not to hit a perfect 10/10 on each category, but to find an intelligent balance between them that meets the goals of your class or training session. That balance will be different every time—even something like sensibility, which seems universally required, may be sacrificed if there is a meta goal of putting high-level practitioners off balance or forcing a situation to deliberately practice awareness and cooperation.
From bad to acceptable
For coaches, bad setups are also those that require additional staff to step in and make changes mid-class, break down and lead to injury, or prevent serving all student needs.
For practitioners, bad setups are those that require more time maneuvering than training, lack safe progression, and create dangerous space for those sharing the space with you.
It’s important to remember that the absence of bad is not the presence of good. Avoiding the problems listed below brings you to the baseline of barely acceptable. It is only after the questions below are answered correctly that you can free up time and attention to do genuinely interesting things with space and equipment.
Let’s quickly look at what makes a set-up fail--Here are some questions you can ask yourself about your designs/setups:
Safety (You want to be answering NO!)
Is there an unstable or untrustworthy configuration of obstacles?
Does it allow or encourage risky or dangerous movement?
Are there unnecessarily slick surfaces or obstructed fall zones?
Are there blind spots that might make collisions likely?
Content (You want to be answering YES!)
Is there enough variety and opportunity to fill the class time/training session?
Is there no clutter and enough space to do things like warmup/strength train?
Are there options for alternatives and progressions?
Does my setup avoid boring, discouraging, overwhelming, or terrifying my students?
(or me)?
Efficiency (You want to be answering YES!)
Does my setup NOT require me to move lots of things during class time?
Can I reuse or reinterpret the same obstacles for different activities?
Am I using as little equipment as possible to address my goals?
From acceptable to excellent
With any given movement, there are obvious design solutions that will jump to mind—classic and simple configurations you have probably seen hundreds of times and know how to set up in your sleep: two precision trainers separated apart for jumping or a single vault box set up to practice vaulting.
As a practitioner, you can work with your training partners to find interesting adjustments. But as a coach, it gets harder. If you have seen a set-up a hundred times, your students have probably seen them a bunch, too, and have gotten all they can out of them.
So to jump into it...
Let’s start with a common example: A lesson in vaulting. Given nothing more than a couple of vault boxes, you can fill 45 minutes with interesting and valuable activities. However, there are plenty of ways to take advantage of the equipment and spaces in a gym to improve upon that basic model.
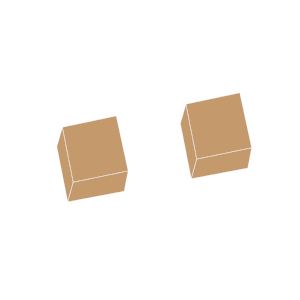
The baseline, barebones setup for a vaulting session:

Our first change can be in any direction. This setup has already achieved maximum simplicity and sensibility. As we alter it, we must ask ourselves some questions:
Are we looking to make the setup more intentional? If so, then what exactly is our intention? For instance, do we want to teach students as many vaults as possible? Put vaults into an actual, useful context, so that students can practice realistically? Perfect the form and power of each individual vault?
Or, are we looking to make the setup more novel, perhaps? in which case we should replace the vault boxes with something weirder—boxes turned on end, or a slanted rail, or a taller box with a sloped runup. We could force a tac before, or a dive roll after, etc. etc., using basic building blocks to create a particular challenge that our students are unlikely to have prepared for.
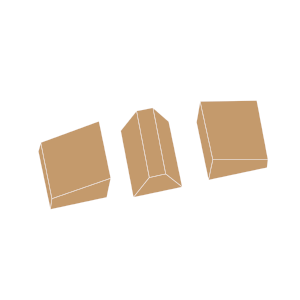
One simple change made for the sake of intentionality (can you guess the intention?):

Another intentionality change:

And another:

Compare those changes to the following change, made for versatility:
Can you think of two or three vaulting-relevant activities that you could do with the two-square box setup that would NOT work with the two original vault boxes?
Another versatility change:

And more:


… and so on.
These options came from a simple, 60-second brainstorm. With half an hour, you could easily apply similar thinking to multiple pieces of equipment, and make a dozen different changes that would push your larger setup from “sure, fine, whatever” to “awesome.”
For coaches especially, the key is to hold yourself to a high standard—don’t stop at the first idea. Interrogate it, criticize it, consider alternatives. Even if you end up going with the original idea, it will be because you’re confident it really is the best way to set up your class, not just because you were tired or lazy.
As with most things in parkour, setup design begins with your goals and improves with practice. Understanding exactly what you want yourself or your students to see, feel, experience, and learn is the key to evaluating your space for relevance and quality.
Start with a goal in mind, brainstorm, and test. Once it’s built (or halfway built), pause and check against your mental model. Do you envision it working? And if not, does it need to be more intentional, more versatile, more novel, more simple, or more sensible?
Some Additional Considerations
This last section covers some general considerations that help you create great setups. They are all flexible, and all of them can be ignored entirely under certain circumstances. But if you were to look at a hundred excellent setups, you’d find them present an awful lot, and if you were to look at a hundred terrible ones, you’d find these things pretty rarely.
Build to your progressions
While you can often do multiple progressions on a single obstacle or setup, it helps to have different setups that actively encourage different approaches. For example, if you’re seeking to push your broad jump distance, building three jumps of different sizes can be more useful than just adjusting one main jump. It allows one to switch back and forth between the jumps for exploring, as well as invites others of different ability levels to train side-by-side.
Build to your workflow
Learning tends to be the most deep when they follow the IVA format:
Instructional - Variation - Application
When planning out your setup, create separate islands of equipment for learning / teaching the skill (instructional, basic), learning / teaching a variant of the skill (variation), and using the skill within a larger context (application). e.g. if the skill is cat leaps, you might have one basic setup that’s a bar grip over a slanted face, a pair of stations that teach cats to vertical walls and cats to bars, and then a final course that includes two or three cats as part of a larger run.
Build with multiple directions in mind
Don’t just think about A → B, but also B → A works also. Though some setups are the same backwards and forwards, it’s incredibly efficient to think about designing setups that are different. It will cut down on time spent arranging obstacles to work on the task at hand.
For Coaches: Build with the group and the whole day / session in mind.
You’ll probably need to warm up.
You’ll probalby need to do some strength training.
You obviously want to train.
You’ll want space to pull a student aside to try an easier, slower, or simpler version
You’ll want a final boss challenge for the students who are unusually brave or advanced.
You’ll want to do some things all together, in lines or in a circle;
You’ll want to do some things individually, with everyone spread out.
Before you start moving boxes around, ask yourself how much open space you need, or where you’ll have everyone line up. Ask yourself how large your students are, and how many of them there will be, so that your lines aren’t bunched up against the obstacles.
Build to your groupings
For coaches: Generally speaking, any class with more than six students should be divided at some point (to cut down on wait time, allow for a more efficient use of space). If you’re expecting ten students, or if you want to do partner drills, or if you know that you’ll have some really tall folks and some really short ones, design multiple pairs of stations that your class can rotate through, instead of just one large main setup.
Art, Not Science
Building awesome setups is an art, not a science. There is no one-size-fits-all, out-of-the-box solution, which is what makes this process fun and exciting. As you come up with your own set-ups and layouts for your lessons, share with us! Did you come up with a creative solution to train or teach something? Shoot us a photo and we’ll throw it on to our website and facebook.
About the Authors
This article was pulled from the Parkour Visions Vault, and was compiled by our design/build team over the years, including Colin MacDonald and Tyson Cecka. Interested in learning more about design and construction in parkour? Check out STURDYmade and join the community online.